
In this AI workshop Direct Marketing, you are going to build a model to predict whether customers will visit a store based on an email campaign experiment. Some people received a campaign focused on women, some received a campaign focused on men, and some did not receive an email at all.
The dataset contains 64,000 customers who’s last purchase was within twelve months before the experiment. The dataset comes from Kevin Hillstrom’s website, where he created “The MineThatData E-Mail Analytics And Data Mining Challenge“. They tracked the results during a period of two weeks following the email campaign.
Microsoft has been using this dataset as well to build a sample with the earlier version of the Azure Machine Learning Studio. You can find this experiment that uses that dataset on the Azure AI Gallery. You can find the description of the origen of the dataset also.
Prerequisites AI Workshop Direct Marketing
In order to build the model, you have some prior steps to take:
- Get an overview of what you are going to do;
- Investigate the data.
Get an overview
Please read the instructions first entirely, so you get a clear overview of the all the steps.
Investigate the data
We highly recommend you visit Kevin Hillstrom’s blog and investigate what kind of data you have available. We will use the dataset that is available on Azure, containing the following variables:
- Recency: Months since last purchase.
- History_Segment: Categorization of dollars spent in the past year.
- History: Actual dollar value spent in the past year.
- Mens: 1/0 indicator, 1 = customer purchased Mens merchandise in the past year.
- Womens: 1/0 indicator, 1 = customer purchased Womens merchandise in the past year.
- Zip_Code: Classifies zip code as Urban, Suburban, or Rural.
- Newbie: 1/0 indicator, 1 = New customer in the past twelve months.
- Channel: Describes the channels the customer purchased from in the past year.
- Segment: Describes the e-mail campaign the customer received as Mens E-Mail, Womens E-Mail, or No E-Mail
- Visit: 1/0 indicator, 1 = Customer visited website in the following two weeks.
- Conversion: 1/0 indicator, 1 = Customer purchased merchandise in the following two weeks.
- Spend: Actual dollars spent in the following two weeks.
- DM_category: No further description.
You can download the direct_marketing.csv dataset and store it locally, or you can use the URL to get the data.
Steps to build the model
We will build the model on Azure. The steps in this workshop are similar to those of the Tutorial: AutoML – train no-code AutoML in the Azure Machine Learning studio. The Azure Machine Learning Studio is an online environment, where you can build and deploy your models. There is a nice overview of the Azure Machine Learning Studio on Microsoft Docs.
We are following the first 3 steps of that tutorial:
- The first step is: Create an Azure Machine Learning workspace.
- The second step is: Run an automated machine learning experiment.
- Finally, you can: Explore model details.
Step 1: Create an Azure Machine Learning workspace
The Azure Machine Learning workspace is an environment where you can build your models. I would recommend you to use a specific resource group for this experiment, so you can clean up your resources easily after this workshop.
To start, open the above mentioned tutorial in a browser and read the instructions. You are first going to the section “Create a workspace“. You can follow the instructions step by step. When you click on “create”, it might be a good moment to take a coffee, although deployment is rather fast.
When the Azure Machine Learning workspace is ready, you have to follow the instructions of section “Sign in to the Studio“, but stop where the instructions tell you to create a New Automated ML run (this will come later on).
We are now going to the section “Create and Load Dataset“. You can follow the instructions. I used the online storage, but you can also download the dataset and store it locally.
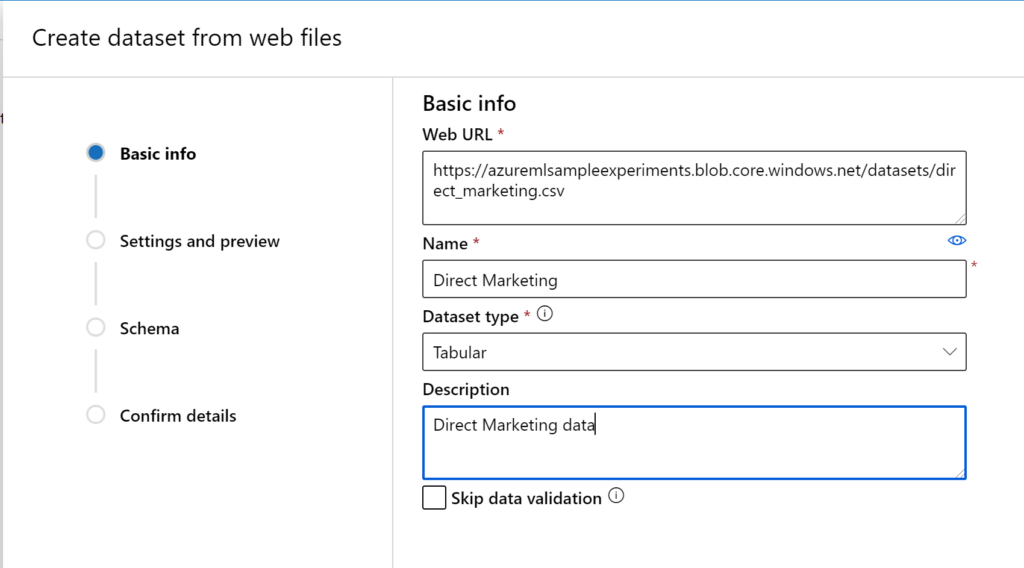
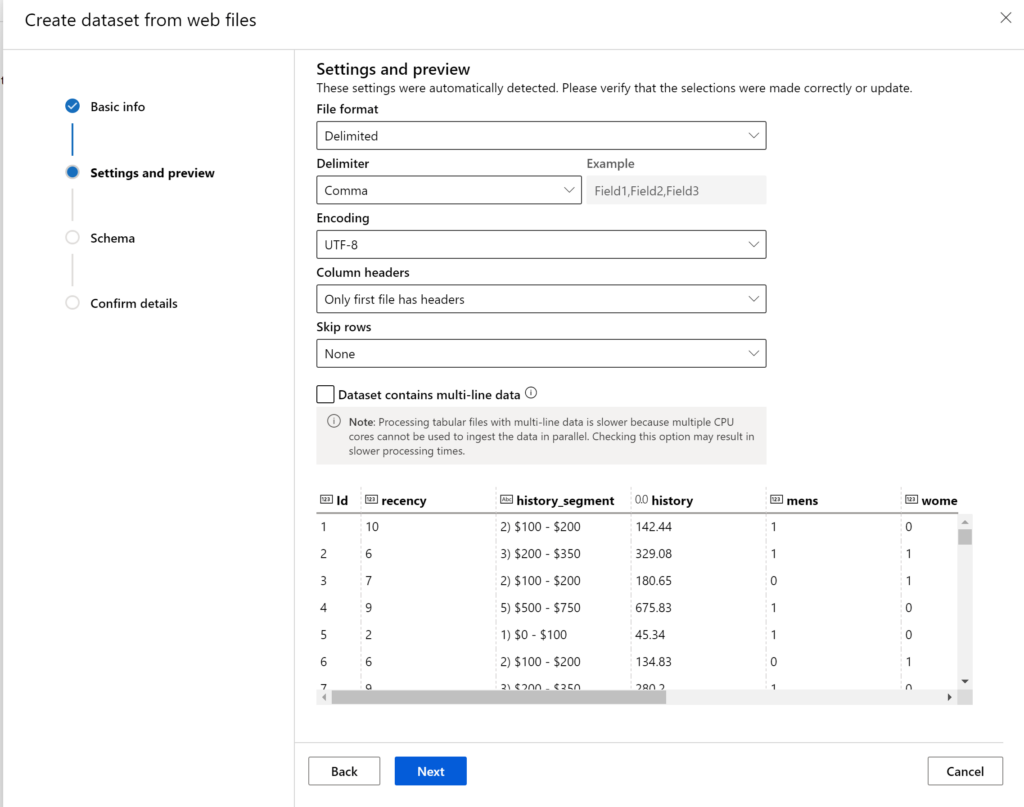
When you click on “next” as instructed, the parsing of the dataset starts and you will get a nice preview.
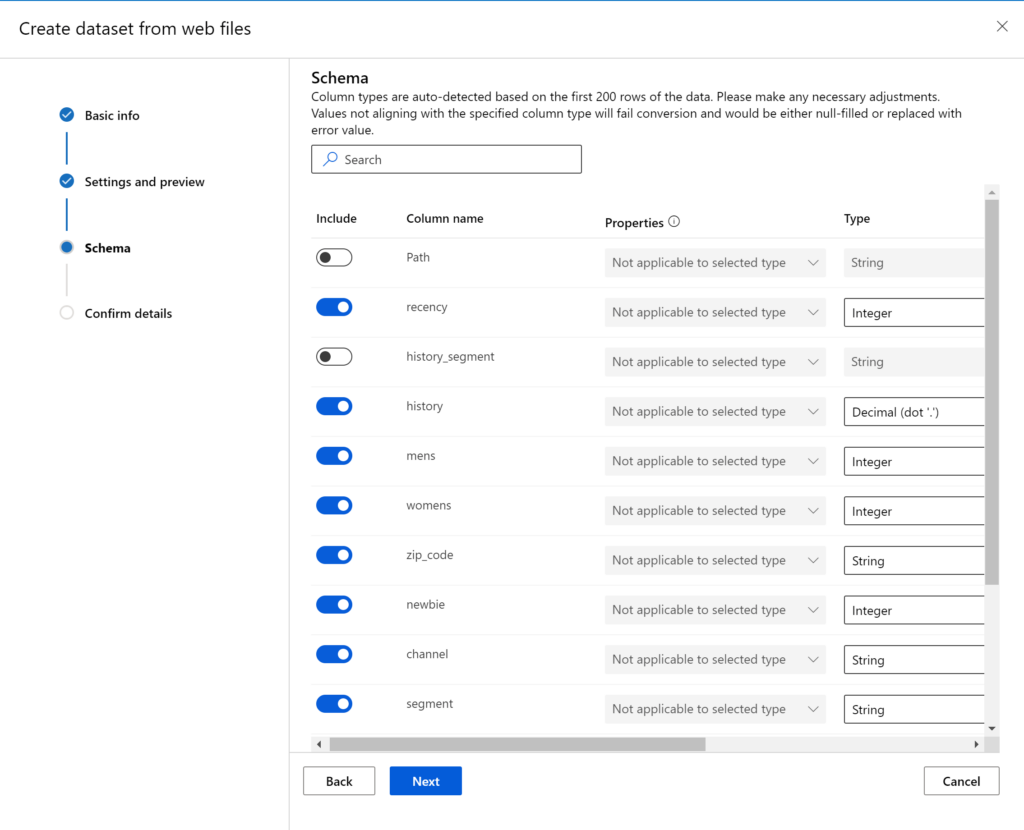
Next, we will select the variables we need for this model. Our goal is to predict whether a customer will Visit a store or not. Therefore, Regarding step i, you have to create the next scheme: delete the other 2 dependent variables Conversion and Spend. Remove History_Segment, as it is a derivation of History. Finally, remove DM_category, as we don’t have any explanation for this variable.
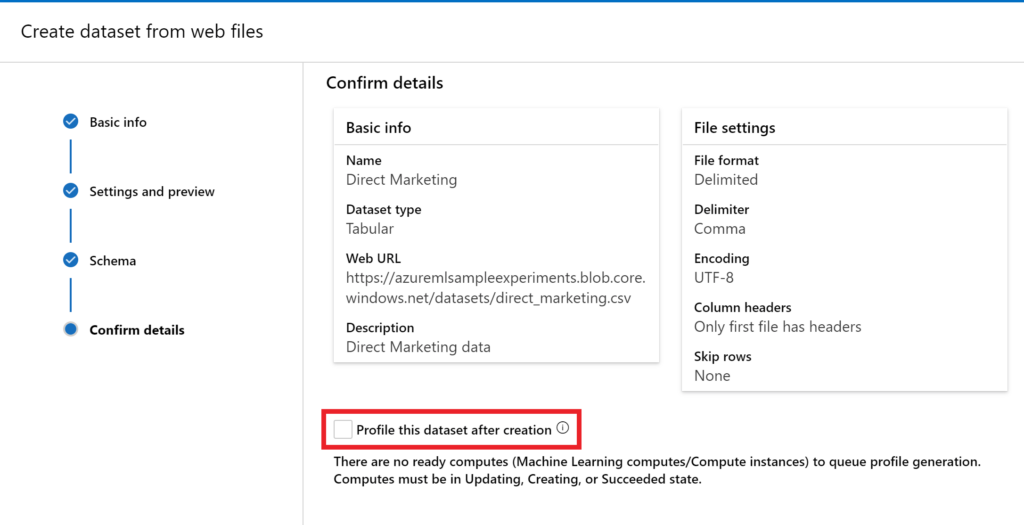
Finally, you can check your settings and confirm them. As we don’t have created a compute yet, we can’t profile the data for now, but we can do that in the future. Click on create
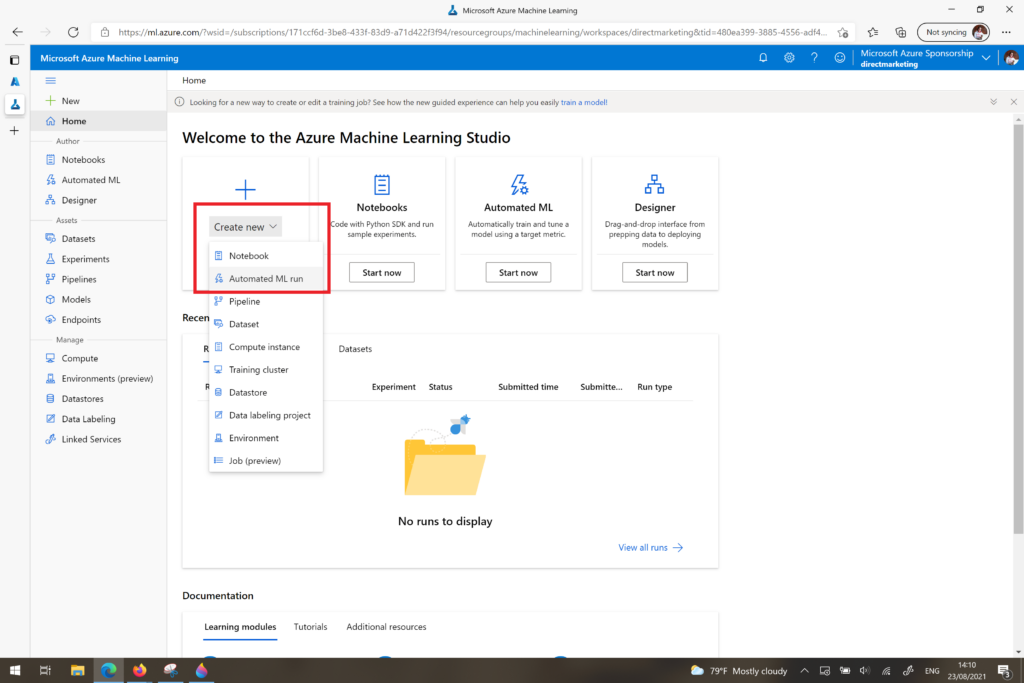
Now you are ready to create a new automated machine learning experiment!
Step 2: Run an automated machine learning experiment to create a Direct Marketing model.
You can go to the section “Configure run” and follow the steps, but please be a little flexible as things might be somewhat different.
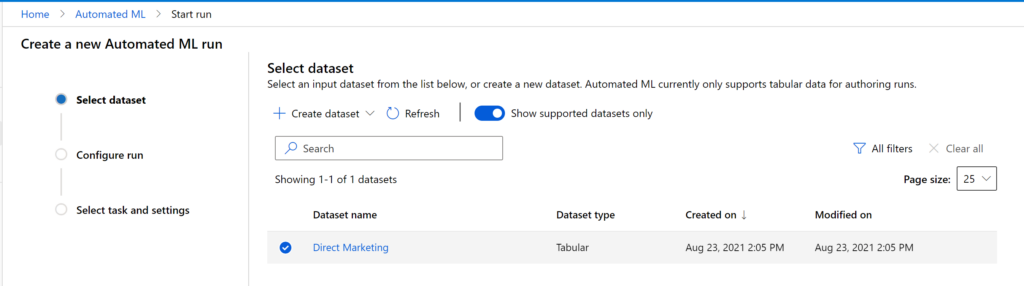
The first step is to select your dataset.
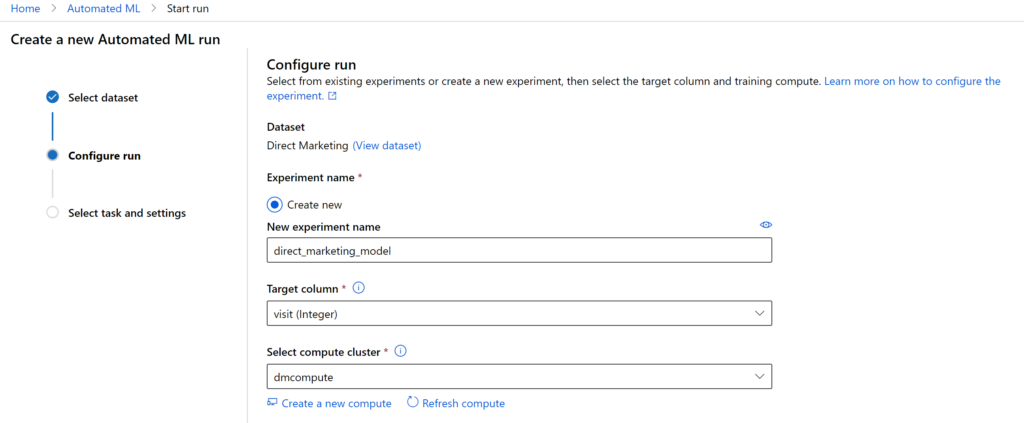
To configure the run, you also need to create a compute. You can just follow the steps, but instead of a maximum of 6 nodes (section c ii), I used 2. And of course, in our case we want to predict whether a customer will visit a store or not, so our target variable is “visit”.
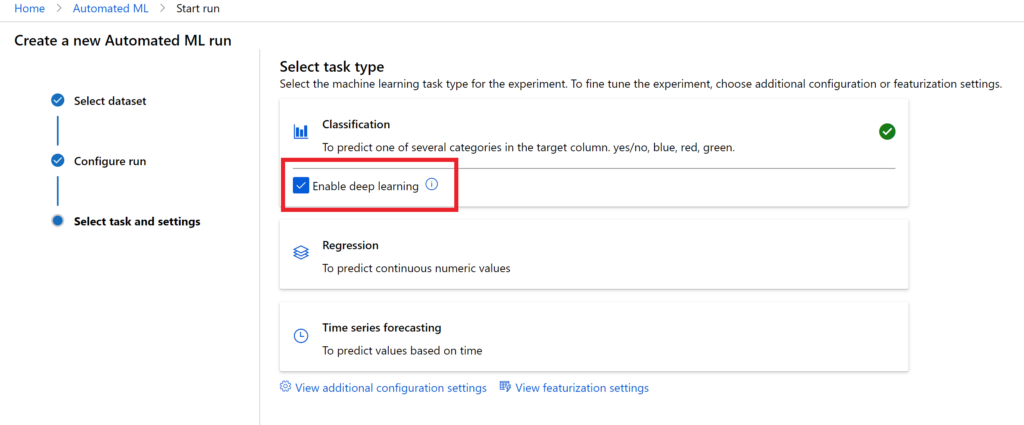
Regarding the Select task and setting part, there is now an option to use “Deep Learning”.
Regarding the additional configuration settings, it might be nice to read more about the primary metrics. Further settings are quite like the instructions, but CHECK THIS: I only use 30 minutes to run the model (0.5 hours).
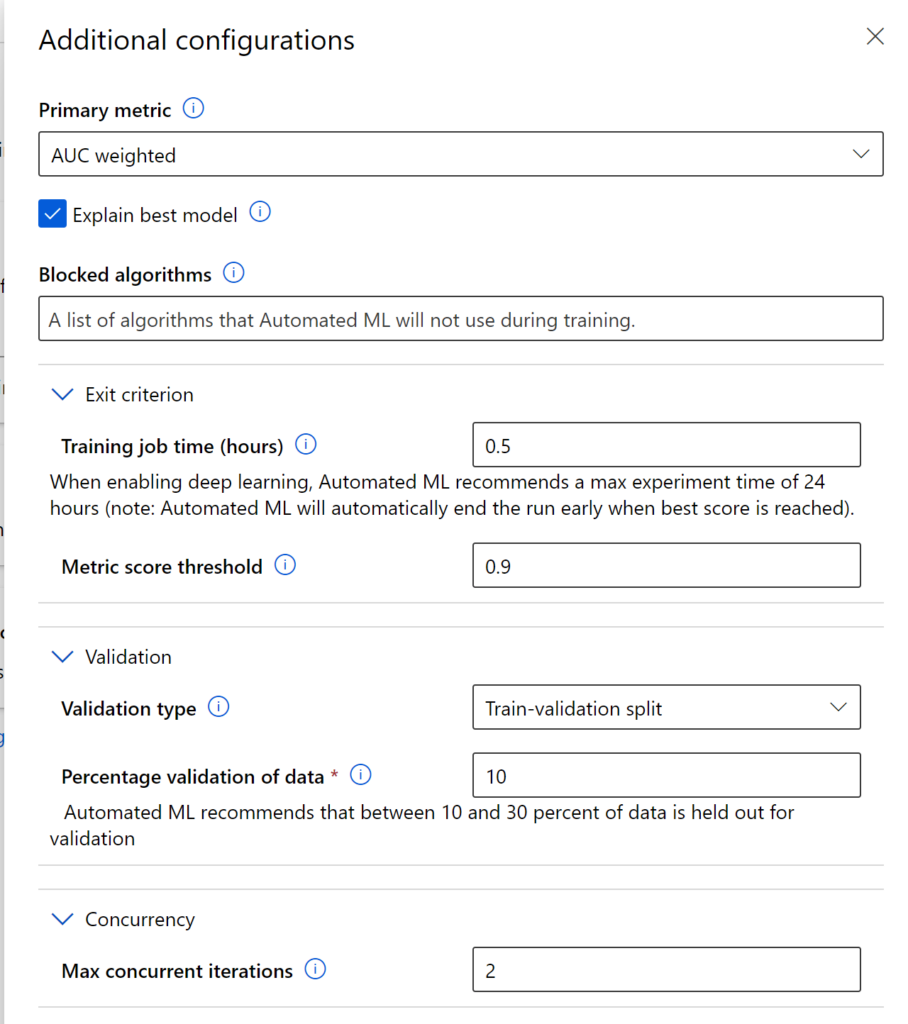
In the tutorial there is not yet and explanation about the featurization. For now, we leave it like this:

Finally, you are ready to click the “Finish” button and this is where your coffee break starts. Remember the configuration of the 2 exit criterias: one is the time (30 minutes) and the other is the value of the primary metric (AUC_weighted reaches 0.90). Most of the time, you will need all of the assigned time to build the best model, hence a cup of tea or coffee can be nice.
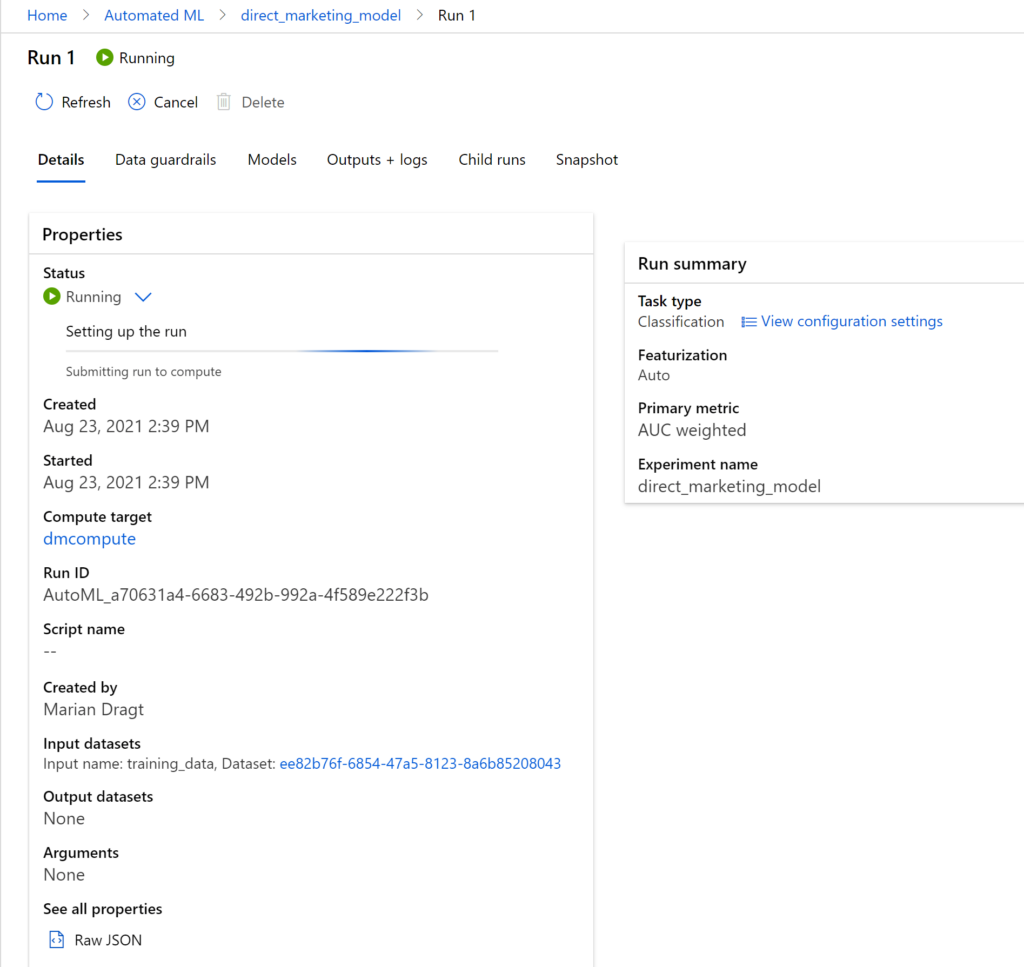
Meanwhile, you can check your run every now and then:
Step 3: Explore the Direct Marketing model details.
Under the “Explore models” sections of the tutorial, you can find all the steps to explore how well your model did.
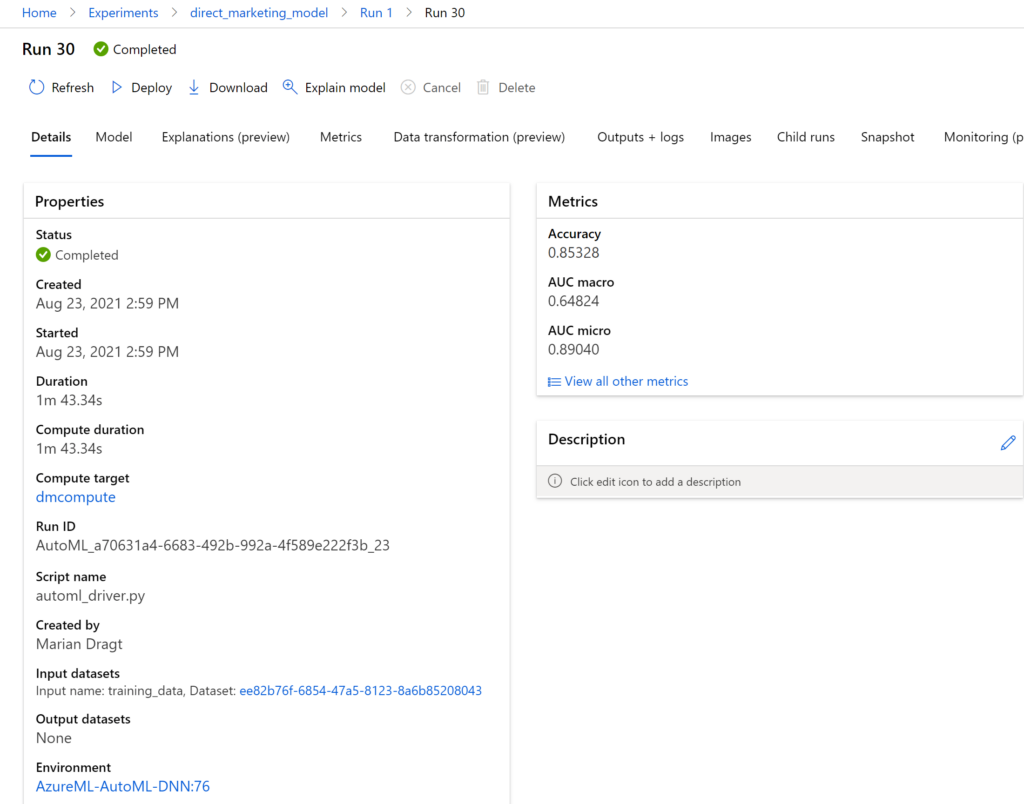
Instead of walking you through these steps and giving my opinion, I would love to hear what you think about this model:
- Do you think that it is good enough? Why/why not?
- What would you do differently?
- What are the most important variables if it comes to predicting a store’s visit?
Want to build more models? Then take a look at our other hands-on labs!